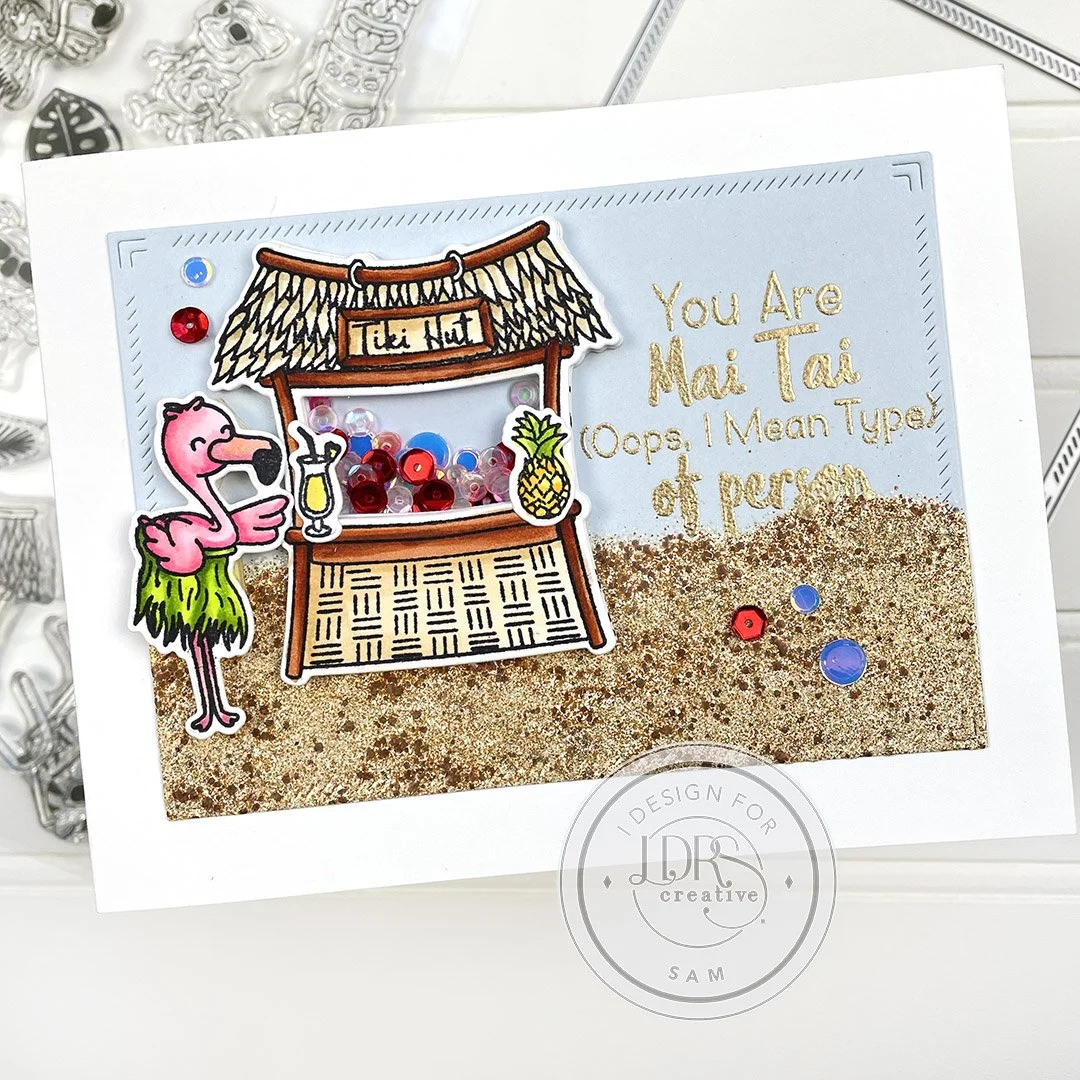
Mini Shaker Window and some Layout Tips
/The new Gone to Maui Exclusive Kit certainly takes me to my happy place. I can see many fun scenes being made with the stamp set. But when I first saw this stamp set all I could think about is making a really, really, cute mini shaker window with the Tiki Hut. So lets jump right into it.
Get the look:
Sometimes when I’m lining up a bunch of characters or want to make sure that my scene lays out nicely on my card front, I stamp, colour and diecut all the elements first. That gives me the opportunity to play around with positioning before I commit to anything.
So in this case, stamp, colour and diecut your character, tiki hut and accessories.
In addition die cut a piece of blue card stock with A2 Diagonal Stitched Layered Card Toppers Die using the 3 3/8" x 4 5/8" size die. This piece wil be the background to lay the scene out on.
Before playing with placement of the elements on the background we want to add a fun sandy beach. With embossing ink, ink up the bottom third of the blue card stock, cover with sand embossing powder and heat set with embossing tool.
With the background and scene elements we can now sit and play around with how everything will fit on the card nicely. First work out the best placement of the Tiki Hut and Flamingo on the beachy background, so that there is enough space for the sentiment to also fit. At this point it is easy to adjust and shift stuff around. When sentiment positioning is determined; stamp and emboss.
Time to build shaker: Add a small sheet of acetate to the back of the coloured in tiki hut image, set it aside. It is possible to create a shaker using foam tape, but in this case the tiki hut side walls are fairly narrow. So I find it much easier to use the tiki hut die and die cut out of card stock and layer it up. Die cut 6 or more of the tiki hut out of a thickish card stock and glue together. Take the glued stack of tiki huts, position and adhere it over embossed sand on the background. At this point you will have a very boring white tiki hut. Take an assortment of sparkly sequins and gems from your stash and fill shaker well. Adhere the coloured in tiki hut with acetate panel ontop to seal off the shaker.
Decorate your tiki hut with the diecut accessories. Position and adhere your character using foam tape to give it the same depth as the Tiki Hut.
Lastly adhere shaker panel to an A2 card base.
Hope the layout tips are useful, next time you want to layout a scene on a card. Happy papercrafting : )


